Wednesday, August 27, 2014

Hello Baby....

Hi everyone,
 
Well, as usual life gets busy raising a family, going back to school and homework every nite takes priority over other things.  However, with that said I still try to find time to sneek in a little something here and there.  So a dear friend of mine is due to have a baby girl here very soon.  So once I had heard it was a girl I couldn't wait to get to work on this sweet little album I put together for her.
 
I used the irresistable Hello Baby line from Simple Stories. The babies room is going to decorated in pink, gray and white.  So the paper couldn't have been more perfect for this baby album. I started out by using just basic chipboard and covering it with the paper.  From there its all about adding and making the embellishments.   
This paper line comes with so many sweet little stickers and die cuts.  I used doilies and glittered tons of embellishments her and there.  Another one of my most favorite things is making flowers from felt with some die cuts that I absolutley love.


 I used all different kinds of textures from vintage lace to burlap flowers.  I made little pockets from the cards that come with the paper line as well.  Inside the pockets I just created little tags to go inside with some sweet little baby sentiments and tied the tops with some fringe type cording and seam binding.


For this little sentiment I just created a fold out so that she could add more pictures to the inside when you unfold it.

This last page was made by creating two little fold outs and both incorporate little spaces for 12 little photos on each fold out.  So one is 1-6 months and the other is 7-12 months.  So it comes out like an according almost.  I failed to take a picture of it unfolded but I hope you can get the idea.  Below is a little gift bag I had made for the album to go inside of.

This is just a plain white bag that I got from Michael's and then just used a cut out from a Kaiser Kraft line.  Placed it on the front of the bag and added some more ribbon and lace with a few flowers and viola, there you have the perfect little gift bag and so easy to do.

 
Enjoy, and I hope to be back soon with some more creations.  I'd love the comments if you have the time to leave one.  Thanks for visiting and happy crafting!  :)
 
 
Here is a door banner that with a little help from my friends and a wonderful machine called the Shilouette I was able to create this door banner for my daughters Kindergarten teacher.  This was done for Teacher Appreciation Week and her teacher loves frogs.  So each of the frogs have their names next to them and as you can see the girls have flowers and the boys have the cattails behind them.

I created the cattails by cutting them out on to butcher paper and then I just added some
Flower Soft to them and they actually came out looking pretty good.  I made the butterflies using a Tim Holtz die and then just added glitter to them.

I later added some grass to the bottom to make it more complete.  It just seemed unfinished to me without it. :)

This was a lot of work but so worth it at the end.  Her teacher loved it and the kids got such a kick out of seeing their names next to the frogs.  :)


Sunday, April 27, 2014

The Shabby Tea Room #216 "TIC TAC TOE"

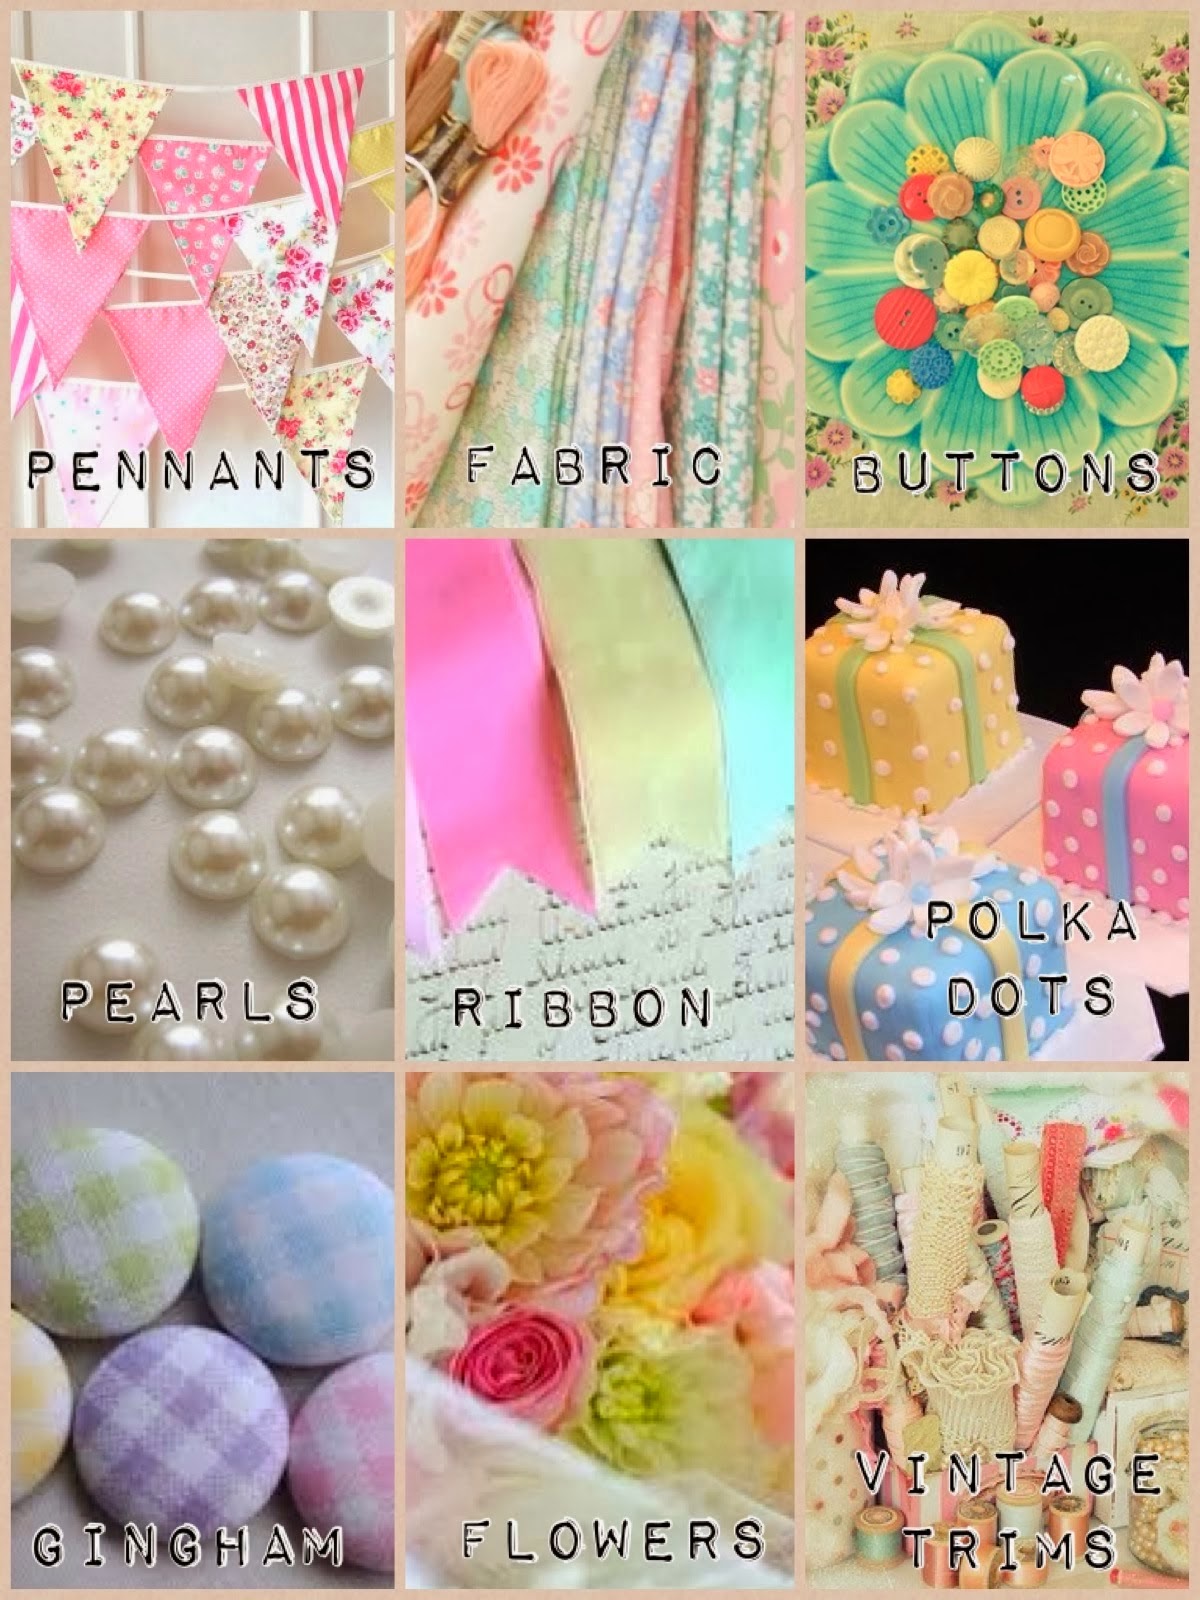
Well ladies, sadly this is my last week designing for The Shabby Tea Room.  Debbie, again thank you so very much for the opportunity to be the April Month Guest Designer and to be a part of all the wonderful designers there.  I have really enjoyed this and hope that all of you that praticipted had as much fun as I did.  So here again is the inspiration photo that challenged my creativity in a little different way.

 
For this paticular challenge we had to use the Tic Tac Toe method using any three elements in a row.  Weather it be horizontal, diagonal or vertical we had to use all the elements in each row from whatever row we picked.  I chose the diagonal row which included, pennants, ribbon and vintage trim.  All three of which are my fave's.  So instead of making a card i decided to change it up a bit and made something using an 8 x 8 canvas as the background.  And so here it is:

 
I started by inking the edges of my canvas and then using my all time favorite Prima line.  After laying down the background  I then created a pocket for the front of the canvas.  I then took various shaped tags and covered them with the patterned paper, adhered some metal knobs and then tied bows out of thread around the knobs and then inserted those inside the pocket.  I took a doily and cut it in half and placed one half on the inside and the other half on the outside edge of the pocket.  Added some vintage trim along the top and took a wooden saying and painted it and then inked the edges.  The flowers are mostly paper but the one in the center was made using ribbon with a rhinestone placed in the center.  The two envelopes are from a die cut and I nestled those inside by using a little Tim Holtz pin.  I then took one of my doll stamps and created her by stamping her on to patterned paper and cutting out the pieces. I then just finished it off with some resin flowers, pearls and the pennant at the top is just cut out using the Prima paper.  The butterfly was also cut out from the paper as well as using a punch for the smaller ones.  Add some rhinestone trim and your project is complete!  :)
 
I cannot wait to see what you all came up with for this great challenge and be sure as always to stop by and admire the other wonderful creations over at The Shabby Tea Room! 
 
Thank you to all who participated and have fun creating!
 
Here is the supply list for the canvas:
 
Supplies: Canvas: (Dick Blick);  Doll stamp, resin flowers and patterned paper: Fairy Belle (Prima);  Pearls: (Michael's);  Metal knobs, pin and distress ink: (Tim Holtz);  Envelope die cut and stamp: A Pocketful (Wplus9);  Misc: vintage trim, rhinestone trim, paper flowers, sewing machine and wooden saying


Sunday, April 20, 2014

The Shabby Tea Room #215 "Pastel Goodness"

Ok, so here we are with another great challenge this week from The Shabby Tea Room.  This challenege is  to create a project including polka dots and flowers and have everything pastel.  It can't get much better than this ladies!  Again, the colors are fabulous and ones I use often to create many things.  Here is the photo, so lets put on our creative hats and get our hands to work on something spectacular!  :)


So again, I started with my basic cream colored cardstock and my patterend paper.  As you can see I use cream a lot as my background for many things.  I might have to think about changing that up some. :)  Ok, so I then just chose the patterned paper and started layering as I go.  I used felt for all of the flowers you see as well as the hearts.  Some paper leaves, seam binding and another little Easter sentiment.
   
 
I can't wait to see all of your beautiful creations over at The Shabby Tea Room
 
Here are the supplies used for this card:


Supplies:  Cream cardstock and pearls: (Michael's);  Patterned paper and cardstock sticker: (the girl's paperie);  Felt, flower and heart die cut and stamp: (Papertrey Ink);  Distress Ink: Gathered Twigs (Tim Holtz);  Paper leaves: (Prima) Misc: seam binding, lace and corner rounder

Sunday, April 13, 2014

The Shabby Tea Room Week #214 "Easter Goodness"

Hello all!  I hope you have had a wonderful week! Well, with Easter coming upon very soon I was very excited to do this project not only beacause of the color scheme but because I just love Easter! :)   So here we are with another fun challenge at The Shabby Tea Room with some of the sweetest shabby chic colors, this color combo is my all time favorite.  So here is the card I created based on the inspiration photo.

 
The challenge was to add polka dots and stripes and that was right up my ally! :)  


Again, I started by using cream colored cardstock as my base and then from there started to layer my patterned paper.  This paticular line of paper I ordered from Sweden.  It was one of those things I just had to have!!  :)  So I used a floral pattern, a stripe pattern and some polka dots.  The sweet little bird atc card, the rose embellishment and the bird were also part of the paper line.  I then used my favorite seam binding, some pins and another tag to say "Easter Wishes."  I absolutley love Easter, it is one of my favorite times of the year.  This day has such special meaning and I hold it very dear to my heart.  I then added a chipboard frame, glittered it and pop dotted it so that I could give it a dimensional look.  I then added some metal trinkets and a resin rose to complete the card. 
 
Be sure to stop over at The Shabby Tea Room and join in on this fun challenge. Have fun creating!  And I hope you all have a wonderful and blessed Easter!
 
Here are the supplies I used to create this card:
 
Supplies: Cream Cardstock and pearls: (Michael's); Patterned paper, chipboard embellishments and ATC card: Country Escape (Tilda);  Polka dot patterned paper: Neapolitan (American Crafts);  Chipboard frame: (Tattered Angels); Glitter: (Martha Stewart);  Distress Ink: Gathered Twigs (Tim Holtz);  Resin Flower: (Prima);  Metal flowers: (Bead store);  Decorative pins: (Maya Road);  Stamped semtimet: (Papertrey Ink and Crafty Secrets);  Misc: (seam binding and sewing machine) 


Sunday, April 6, 2014

The Shabby Tea Room April Guest Designer #213 "Floral Fantasy"

Hi all, well as always it has been some time since my last post but I wanted to share some exciting news!  I have been given the priveledge of being the Month-Long April Guest Designer for The Shabby Tea Room.  I have admired Debbie's blog for some time now and absolutely love it so thank you Debbie!  I have really had so much fun creating these cards! 

I hope you can join in on these fun challenges and also take a look at the other designers beautiful handy work.   

So here is the inspiration challenge photo for Week #213. The challenge for this week is to included ribbon, lace and flowers based on the colors in the photo below. 


This is the card I created using these happy, beautiful, colors that remind me so much of Spring!  I started by using just a basic cream colored cardstock, and then just adding the pieces of patterned paper atop of that.   I used a border punch for the bottom part of the card and then used my sewing machine and sewed the two pieces together.  I then just added some lace and some sweet seam binding along with a tag that I inked around the edges and then added a sweet sentiment. The mason jar is also from the same paper line I used for the card.  The felt shaped hearts and flower are die cuts that I often use for many occasions.  I then added the two leafs and a bit of twine to finish it all off.   
 
 
Again, be sure to stop by The Shabby Tea Room for more wonderful inspiration!
 
Here are the supplies I used to create this card:
 
Supplies:  Cream Cardstock and Pearls: (Michael's);  Patterned Paper: Neapolitan (American Crafts);  Border Punch and Leaf Punch: (Martha  Stewart); Heart and Flower Die cuts, felt and stamped sentiment: (Papertry Ink);  Tag Punch: (McGill);  Distress Ink: Gathered Twigs (Tim Holtz);  Misc: Sewing machine, seam binding, lace and twine.

Shabby Wall Hanging....

Happy Sunday, I hope you all have had a great week and are ready for the week ahead.  Here is a little something I fixed up for a friend of mine.  She had been given this one year as a gift at Christmas which happened to be painted black around the outside and the inside had an array of colors that didn't quite go with her decor.  So I decided to give it a little face lift and gave it a Shabby Chic look.  It was quite fun to see the change take place from drab to fab!!  :)

 
I started out by just painting the outside in a cream color shade, distressing it some and adding an aged look to it around the edges.  She then gave me some papers from Prima that she liked and so I cut them out to fit the centers on the two spaces.  From there I used some pennant die cuts that I had and made little banners on each corner. 


I then added some of my favorite flowers and some old stamps.  And then added a little bit of bling to give it that extra special something.  To say the least she was very pleased with the outcome!  I hope you all venture out and inspire to try something a little bit different. 
  
 
Until next time have a wonderful week!


A Belated Valetine...

Hi friends, well this post is coming out at an odd time.  But I wanted to share these little goody bags that I had made for some of my dear friends and the sweet teachers at school.  I hope to have some Easter shabby yumminess to share with you all in a few days.  But for now here is a belated post from February.  :)

These sweet bags were made by simply using some Valentine's paper from Recollections I purchased from Michael's.  I then used a heart die as well as a heart punch from Fiskars.  I fould these cute little heart shaped pink doilies on line and just placed those inside the little glassine bags, which were also purchased as Michael's.

The tiny tags are dies from Papertrey Ink and I then used some twine and seam biniding around the sticks and tied the tiny tags to that. Then I just stuffed the insides with some of their favorite candies.  Just a sweet special way to say "Happy Valentine's Day."   

 These can also be used for any occasion, even Easter!  Hope you try putting some of these sweet little treat bags together to five to a special someone.  Enjoy and thanks for stopping by!